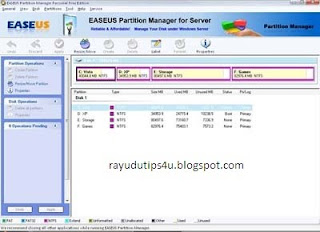
Re-Partition Your Hard Disk Without Losing Data With EASEUS Partition Manager:

Hard disk is place where to keep all data and information within the computer, it’s good to separate and keep the data in hard disk by partition. Normally most of the users will partition their hair disk to two partitions (OS and Data), this is to ensure all their data still remain in the hard disk while their operating system partition corrupted. For those hard disk where no have partition, all the data are keep together with the operating system, and there is a risk hard to recover their data when operating system was corrupted and cannot boot-in to the windows. To prevent this happen, now users can use EASEUS Partition Manager Home Edition.

What is EASEUS Partition Manager ?
EASEUS Partition Manager Home Edition is free comprehensive hard disk partition management software to let you enjoy free with all the powerful functions: Resize and Move partitions, Create, Deleteand Format partitions, Hide and Unhide partitions and much more. What’s more, the freeware works perfectly with hardware RAID and Windows 2000/XP/Vista Operating Systems. Your data is completely protected during all operations. Its great free tool that users can use to re-partition hard disk rather use other partition software where need pay for the license.

Features of EASEUS Partition Manager:

  • Support hardware RAID.
  • Resize and move partitions without losing data.
  • Create, delete and format partitions with simple step.
  • Label partitions – assigned to a partition for easier recognition.
  • View Disk/Partition property of each partition.
  • Hide and unhide partitions – protect important data from unauthorized or casual access.
  • Set an active partition – specify one partition to be the boot partition.
  • Powerful safety features protect you against system failures while partitioning.
  • Step-by-step wizard walks you through partitioning process.
  • Preview any partitioning tasks before completing it.
  • Change cluster size automatically and manually.
  • Undo feature any partition step.
  • Support hard disks from 2 GB to 1 TB.
  • User-friendly interface.

0.0down How to Re Partition Hard Disk Without Losing Data
EASEUS Partition Manager

ICare Data Recovery Software Free Giveaways Worth $69.95

iCare Data Recovery Software Free Giveaways Worth 69.95 iCare Data Recovery Software Free Giveaways Worth $69.95
Get iCare Data Recovery Software worth $69.95, its free until July 15.With icare you can easily recover deleted or formated files from your partitions.It is a file recovery software to undelete, unformat, undoshift+delete. It is pretty useful when you accidently formatted hard drive, partition unintentionally deleted, emptied files from recycle bin, lost photos from digital camera sd card, lost files from memery card, flash card, pen drive, removable hard drive.
Key Features of “iCare Data Recovery Software”:
  • Format recovery: You can use this application to files from formatted partition.
  • SD card recovery: iCare Data Recovery Software is sd card supported to recover photos from formatted partition, raw drive, accidently deleted photos recovery supported.
  • Shift+delete recovery: iCare Data Recovery Software performs a perfect job when searching files that were emptied from recycle bin, or performed shift plus delete.
Step To Get Free iCare Data Recovery Software
1. Download the Software,
Free code: “2K1XB2X964MPHOCJ8M1R6IJF0OVHFOFH”
Note:
  • You need to select a recovery module before you could see the active button.
  • Run the program as OS admin and internet connection is required.
  • No space included when copy and paste the code.

iCare Data Recovery Software Features and Tutorials


nstall it on a non data lost partition. It is recommended you install it on an external drive or USB drive. Or you may install it on a non data lost PC and search the lost files from external hard disk drives to prevent data overwritten. (Install it on usb drive throught this PC, you may just use it on this PC.)

Step one: Run it from desktop icon

Step two: See the main screen and select a recovery module to search files

recovery modules

Which recovery module shall I select?

"Lost Partition Recovery": Recovering files when partition lost or deleted with following symptoms:

  • deleted partition by mistake
  • bad partition table
  • partition lost without a reason
  • partition or drive not detected by PC

"Advanced File Recovery": Recovering files with the following symptoms.

  • SHIFT+DELETE command keys
  • partition inaccessible but is visiable in PC under "Disk Management".
  • emptied recycle bin
  • symptom - drive is not formatted, do you want to format it now

"Deep Scan Recovery": the most powerful recovery module that searches every byte

  • system crashes
  • bad MBR, bad partition table, bad boot sector
  • bad file allocation table
  • software failure like merg partition failure, resize partition failure, ghost failure
  • RAID array damaged
  • symptom - drive is not formatted, do you want to format it now
  • RAW file system, raw drive

"Format Recovery": Recoveirng files related with format problems

  • formatted partition, card etc by mistake
  • CHKDSK is not available for RAW drive
  • Pressed restore button of iPod, iPhone, iTouch, blackberry

For any unstated data loss rescue, we recommend you to use "Deep Scan Recovery" to search lost files.

download

Tutorial to use iCare Data Recovery Software

Step Three: Select “Format Recovery” which is on the very left right corner to recover lost files from formatted drive as an example.
select recovery module

Step Four: Select the partition which was formatted and then click “Recover” to search. And a box showing scanning devices will turn up.
searching formatted files

Step Five: When scanning device finished, there would be a partition which is formatted, be free to click “Show Files” which would list your lost files from your formatted hard drive.
formatted partition containing lost data

Step Six: After clicking “show files”, there will be a list of lost files, you can check whether it is your lost files by "File Preview" or the "Thumbnail" which is offered to preview lost images, office files so far. (as to files not previewed, once iCare Data Recovery locates it and list it in Deleted and Lost Files list, it proves that the file can be restored.) Here is a screenshot that presents files that are listed under the "Thumbnail".

preview

Click "File Preview" to view single file as below.

preview photos

Step Seven: Click "Save Files" to save found files. A code is needed to activate the program and then it will allow you to save found files. Be free to purchase a code to activate iCare Data Recovery Software.

formatted files found


How to register iCare Data Recovery Software

This tutorial will show you how to activate iCare Data Recovery Software.

Step 1, Run the program and select a recovery module to go.

four recovery modules

Step 2, You will see a screen with "Register" button, click it.

activate icare data recovery

Step 3, Enter your license code if you already purchased a code of the program. (Buy a license herehttp://www.icare-recovery.com/purchase.html)

tips: please copy and past the code but do not copy any sapce ahead or after the code.

activate icare with key

Step 4, Click Register and you will see the following screen

register icare successfully

Step 5, Click OK and You don't have to restart PC nor the program. Just select your lost files and save them.


Power Data Recovery 4.52


Power Data Recovery 4.52 Power Data Recovery 4.52

Power Data Recovery is a powerful data recovery software developed by MT Solution Ltd. Since the first release of version 1.0 in 2003 we have had many happy customers around the world. It is one of the fastest and most effective programs of the data recovery software. Power Data Recovery is becomingthe first choice when you need data recovery software to help you recover your lost data.

Features of “Power Data Recovery”:

* Recover data after accidental deletion
* Recover data after an accidental format
* Recover data from an inaccessible volume (logical drive)
* Recover data after FAT corruption
* Recover data after repartition (fdisk)
* Recover data from a crashed physical device
* Recover data after an MBR corruption
* Recover data from a hard disk drive, camera card, USB drive, Zip, floppy disk
* Recover data for any error except physical damage

Key Features

* Supports FAT 12/16/32
* Supports NTFS
* Supports NTFS compressed and encrypted files
* Supports Dynamic Volume including Simple Volume, Spanned Volume, Stripe Volume, Mirror Volume and Raid Volume.
* Supports RAW data recovery
* Built-in preview function
* Built-in resume recovery function
* Built-in Recovery Wizard

0down Power Data Recovery 4.52

Power Data Recovery 4.52

CopyPod-IPod Backup And IPod Recovery Software


CaptureWiz thumb9 CopyPod iPod Backup and iPod recovery Software

CopyPod is the ultimate backup & recovery software for your apple iPod. You are one click away from retrieving your music, ratings, playlists, playcounts to your PC.
CopyPod is a lifesaver when sending your apple iPod for repair, in cases of computer/hard drive crash,or just to backup up to a different drive. CopyPod will do the job effortlessly.

Software Information :

Version: 7.63
File Size:1.42 MB

Key Functions
Full backup of your iPod
Saves/Restores music playlists and personal information
Import playlists and personal information back into iTunes
Playlist order conserved
User friendly and customizable interface
Incremental backup
Full compatibility with all existing iPods
Personal support


00Down CopyPod iPod Backup and iPod recovery Software

http://rapidshare.com/files/71384898/DPOYOCPV763.rar

Or Try 4shared download Link

http://www.4shared.com/file/11835242/2eecf196/CopyPod_v763_By_yOckErLanDNET.html?s=1


PASSWORD : www.smforum.net


Re-installing a Domain Controller

This article is written to give readers a heads up about some issues involved when re-installing a Domain controller. This article is particulary about re-installing a Windows 2000 domain controller and issues that may occur if the re-installation is not done properly.

This article is to be used at the readers own risk and the author nor this project can be held liable for any damage related to this article or your use of information contained here. You could seriously damage Active Directory if you perform tasks related to this subject improperly. This article will outline the issue and point to resources for further information.

If a Windows 2000 domain controller crashes and cannot be gracefully removed from the domain, there are some Active Directory maintenance tasks which should be performed prior to the re-installation of that domain controller or the installation of a new domain controller.

Background

Active Directory is the control mechanism for your Windows domain which allows users to be created or removed and controls access to various objects in the network including servers, workstations, and files. You should be aware that Active Directory treats everything as an object and assigns a unique identifing number to each object including your domain controller servers. When your domain controller is re-created, it will not have the same identifying number. Therefore it is important to use the correct process when dealing with these important objects. There are two cases which may occur when a domain controller must be re-installed:


Crashed Domain Controller which must be replaced or re-installed

If your domain controller crashes and must be re-installed you should clean up Active Directory before installing a new domain controller or re-installing your domain controller. See Microsoft's Knowledge Base Article Q216498 at http://support.microsoft.com/default.aspx?scid=kb;en-us;216498

This procedure describes how to use the NTDS Utility program to clean up active directory. This procedure must be done precisely to avoid damaging Active Directory. If you have not followed the procedures properly, or have installed a new domain controller before cleaning up Active Directory and/or have noticed some unusual effects which may be caused by Active Directory corruption, you should call Microsoft technical support IMMEDIATELY. I recommend that you DO NOT attempt to clean up the corruption yourself.

Windows Server 2003 Service Pack 1 (SP1) or later service packs – Enhanced version of Ntdsutil.exe

The version of Ntdsutil.exe that is included with Service Pack 1 or later service packs for Windows Server 2003 has been enhanced to make the metadata cleanup process complete. The Ntdsutil.exe version that is included with SP1 or later service packs does the following when metadata cleanup is run:
  • Removes the NTDSA or NTDS Setting subject.
  • Removes inbound AD connection objects that existing destination DCs use to replicate from the source DC being deleted .
  • Removes the computer account .
  • Removes FRS member object.
  • Removes FRS subscriber objects.
  • Tries to seize flexible single operations master roles (also known as flexible single master operations or FSMO) held by the DC that are being removed .
Caution The administrator must also make sure that replication has occurred since the demotion before manually removing the NTDS Settings object for any server. Using the Ntdsutil utility incorrectly may result in partial or complete loss of Active Directory functionality.

Procedure 1: Windows Server 2003 SP1 or later service packs only

  1. Click Start, point to Programs, point to Accessories, and then click Command Prompt.
  2. At the command prompt, type ntdsutil, and then press ENTER.
  3. Type metadata cleanup, and then press ENTER. Based on the options given, the administrator can perform the removal, but additional configuration parameters must be specified before the removal can occur.
  4. Type connections and press ENTER. This menu is used to connect to the specific server where the changes occur. If the currently logged on user does not have administrative permissions, different credentials can be supplied by specifying the credentials to use before making the connection. To do this, type set credsDomainNameUserNamePassword, and then press ENTER. For a null password, typenull for the password parameter.
  5. Type connect to server servername, and then press ENTER. You should receive confirmation that the connection is successfully established. If an error occurs, verify that the domain controller being used in the connection is available and the credentials you supplied have administrative permissions on the server.


    Note If you try to connect to the same server that you want to delete, when you try to delete the server that step 15 refers to, you may receive the following error message:
    Error 2094. The DSA Object cannot be deleted0x2094
  6. Type quit, and then press ENTER. The Metadata Cleanup menu appears.
  7. Type select operation target and press ENTER.
  8. Type list domains and press ENTER. A list of domains in the forest is displayed, each with an associated number.
  9. Type select domain number and press ENTER, where number is the number associated with the domain the server you are removing is a member of. The domain you select is used to determine whether the server being removed is the last domain controller of that domain.
  10. Type list sites and press ENTER. A list of sites, each with an associated number, appears.
  11. Type select site number and press ENTER, where number is the number associated with the site the server you are removing is a member of. You should receive a confirmation listing the site and domain you chose.
  12. Type list servers in site and press ENTER. A list of servers in the site, each with an associated number, is displayed.
  13. Type select server number, where number is the number associated with the server you want to remove. You receive a confirmation listing the selected server, its Domain Name System (DNS) host name, and the location of the server's computer account you want to remove.
  14. Type quit and press ENTER. The Metadata Cleanup menu appears.
  15. Type remove selected server and press ENTER. You should receive confirmation that the removal completed successfully. If you receive the following error message, the NTDS Settings object may already be removed from Active Directory as the result of another administrator removing the NTDS Settings object or replication of the successful removal of the object after running the DCPROMO utility.
    Error 8419 (0x20E3)

    The DSA object could not be found


    Note You may also see this error when you try to bind to the domain controller that will be removed. Ntdsutil has to bind to a domain controller other than the one that will be removed with metadata cleanup.
  16. Type quit, and then press ENTER at each menu quit the Ntdsutil utility. You should receive confirmation that the connection disconnected successfully.
  17. Remove the cname record in the _msdcs.root domain of forest zone in DNS. Assuming that DC will be reinstalled and re-promoted, a new NTDS Settings object is created with a new GUID and a matching cname record in DNS. You do not want the DCs that exist to use the old cname record.


    As best practice, you should delete the host name and other DNS records. If the lease time that remains on Dynamic Host Configuration Protocol (DHCP) address assigned to offline server is exceeded then another client can obtain the IP address of the problem DC.
  18. In the DNS console, use the DNS MMC to delete the A record in DNS. The A record is also known as the Host record. To delete the A record, right-click the A record, and then click Delete. Also, delete the cname record in the _msdcs container. To do this, expand the _msdcs container, right-click cname, and then click Delete.


    Important If this is a DNS server, remove the reference to this DC under the Name Servers tab. To do this, in the DNS console, click the domain name under Forward Lookup Zones, and then remove this server from the Name Servers tab.


    Note If you have reverse lookup zones, also remove the server from these zones.
  19. If the deleted computer is the last domain controller in a child domain, and the child domain was also deleted, use ADSIEdit to delete the trustDomain object for the child. To do this, follow these steps:
    1. Click Start, click Run, type adsiedit.msc, and then click OK
    2. Expand the Domain NC container.
    3. Expand DC=Your Domain, DC=COM, PRI, LOCAL, NET.
    4. Expand CN=System.
    5. Right-click the Trust Domain object, and then click Delete.
  20. Use Active Directory Sites and Services to remove the domain controller. To do this, follow these steps:
    1. Start Active Directory Sites and Services.
    2. Expand Sites.
    3. Expand the server's site. The default site is Default-First-Site-Name.
    4. Expand Server.
    5. Right-click the domain controller, and then click Delete.
  21. When you use DFS Replication in Windows Server 2008 and in later versions, the current version of Ntdsutil.exe does not clean up the DFS Replication object. In this case, you can use Adsiedit.msc to correct the DFS Replication objects for Active Directory Domain Services (AD DS) manually. To do this, follow these steps:
    1. Logon a domain controller as a domain administrator in the affected domain.
    2. Start Adsiedit.msc.
    3. Connect to the default naming context.
    4. Locate the following DFS Replication topology container:
      CN=Topology,CN=Domain System Volume,CN=DFSR-Globalsettings,CN=System,DC=Your Domain,DC=Domain Suffix
    5. Delete the msDFSR-Member CN object that has the old computer name.

Procedure 2: Windows 2000 (All versions) Windows Server 2003 RTM

  1. Click Start, point to Programs, point to Accessories, and then click Command Prompt.
  2. At the command prompt, type ntdsutil, and then press ENTER.
  3. Type metadata cleanup, and then press ENTER. Based on the options given, the administrator can perform the removal, but additional configuration parameters must be specified before the removal can occur.
  4. Type connections and press ENTER. This menu is used to connect to the specific server where the changes occur. If the currently logged on user does not have administrative permissions, different credentials can be supplied by specifying the credentials to use before you make the connection. To do this, type set credsDomainNameUserNamePassword, and then press ENTER. For a null password, typenull for the password parameter.
  5. Type connect to server servername, and then press ENTER. You should receive confirmation that the connection is successfully established. If an error occurs, verify that the domain controller being used in the connection is available and the credentials you supplied have administrative permissions on the server.


    Note If you try to connect to the same server that you want to delete, when you try to delete the server that step 15 refers to, you may receive the following error message:
    Error 2094. The DSA Object cannot be deleted0x2094
  6. Type quit, and then press ENTER. The Metadata Cleanup menu appears.
  7. Type select operation target and press ENTER.
  8. Type list domains and press ENTER. A list of domains in the forest is displayed, each with an associated number.
  9. Type select domain number and press ENTER, where number is the number associated with the domain the server you are removing is a member of. The domain you select is used to determine whether the server being removed is the last domain controller of that domain.
  10. Type list sites and press ENTER. A list of sites, each with an associated number, is displayed.
  11. Type select site number and press ENTER, where number is the number associated with the site the server you are removing is a member of. You should receive a confirmation listing the site and domain you chose.
  12. Type list servers in site and press ENTER. A list of servers in the site, each with an associated number, is displayed.
  13. Type select server number, where number is the number associated with the server you want to remove. You receive a confirmation listing the selected server, its Domain Name System (DNS) host name, and the location of the server's computer account you want to remove.
  14. Type quit and press ENTER. The Metadata Cleanup menu appears.
  15. Type remove selected server and press ENTER. You should receive confirmation that the removal completed successfully. If you receive the following error message:
    Error 8419 (0x20E3)

    The DSA object could not be found
    the NTDS Settings object may already be removed from Active Directory as the result of another administrator removing the NTDS Settings object, or replication of the successful removal of the object after you run the Dcpromo utility.


    Note You may also see this error when you try to bind to the domain controller that will be removed. Ntdsutil has to bind to a domain controller other than the one that will be removed with metadata cleanup.
  16. Type quit at each menu to quit the Ntdsutil utility. You should receive confirmation that the connection disconnected successfully.
  17. Remove the cname record in the _msdcs.root domain of forest zone in DNS. Assuming that DC will be reinstalled and re-promoted, a new NTDS Settings object is created by using a new GUID and a matching cname record in DNS. You do not want the DC's that exist to use the old cname record.


    As best practice you should delete the hostname and other DNS records. If the lease time that remains on Dynamic Host Configuration Protocol (DHCP) address assigned to offline server is exceeded then another client can obtain the IP address of the problem DC.
Now that the NTDS Settings object has been deleted, you can delete the computer account, the FRS member object, the cname (or Alias) record in the _msdcs container, the A (or Host) record in DNS, the trustDomain object for a deleted child domain, and the domain controller.


Note You do not need to manually remove the FRS member object in Windows Server 2003 RTM because the Ntdsutil.exe utility has already removed the FRS member object when you run the utility. Additionaly, the metadata of the computer account cannot be removed if the computer account of the DC contains another leaf object. For example, Remote Installation Services (RIS) might be installed on the DC.


The Adsiedit utility is included with the Windows Support Tools feature in both Windows 2000 Server and Windows Server 2003. To install the Windows Support Tools, following these steps:
  • Windows 2000 Server: On the Windows 2000 Server CD, open the Support\Tools folder, double-click Setup.exe, and then follow the instructions that appear on the screen.
  • Windows Server 2003: On the Windows Server 2003 CD, open the Support\Tools folder, double-click Suptools.msi, click Install, and then follow the steps in the Windows Support Tools Setup Wizard to complete the installation.
  1. Use ADSIEdit to delete the computer account. To do this, follow these steps:
    1. Click Start, click Run, type adsiedit.msc in the Open box, and then click OK.
    2. Expand the Domain NC container.
    3. Expand DC=Your Domain Name, DC=COM, PRI, LOCAL, NET.
    4. Expand OU=Domain Controllers.
    5. Right-click CN=domain controller name, and then click Delete.
    If you receive the "DSA object cannot be deleted" error message when you try to delete the object, change the UserAccountControl value. To change the UserAccountControl value, right-click the domain controller in ADSIEdit, and then click Properties. UnderSelect a property to view, click UserAccountControl. Click Clear, change the value to 4096, and then click Set. You can now delete the object.


    Note The FRS subscriber object is deleted when the computer object is deleted because it is a child of the computer account.
  2. Use ADSIEdit to delete the FRS member object. To do this, follow these steps:
    1. Click Start, click Run, type adsiedit.msc in the Open box, and then click OK
    2. Expand the Domain NC container.
    3. Expand DC=Your Domain, DC=COM, PRI, LOCAL, NET.
    4. Expand CN=System.
    5. Expand CN=File Replication Service.
    6. Expand CN=Domain System Volume (SYSVOL share).
    7. Right-click the domain controller you are removing, and then click Delete.
  3. In the DNS console, use the DNS MMC to delete the A record in DNS. The A record is also known as the Host record. To delete the A record, right-click the A record, and then click Delete. Also delete the cname (also known as the Alias) record in the _msdcscontainer. To do so, expand the _msdcs container, right-click the cname, and then clickDelete.


    Important If this was a DNS server, remove the reference to this DC under the Name Servers tab. To do this, in the DNS console, right-click the domain name underForward Lookup Zones, click Properties, and then remove this server from theName Servers tab.


    Note If you have reverse lookup zones, also remove the server from these zones.
  4. If the deleted computer was the last domain controller in a child domain and the child domain was also deleted, use ADSIEdit to delete the trustDomain object for the child. To do this, follow these steps:
    1. Click Start, click Run, type adsiedit.msc in the Open box, and then click OK
    2. Expand the Domain NC container.
    3. Expand DC=Your Domain, DC=COM, PRI, LOCAL, NET.
    4. Expand CN=System.
    5. Right-click the Trust Domain object, and then click Delete.
  5. Use Active Directory Sites and Services to remove the domain controller. To do this, follow these steps:
    1. Start Active Directory Sites and Services.
    2. Expand Sites.
    3. Expand the server's site. The default site is Default-First-Site-Name.
    4. Expand Server.
    5. Right-click the domain controller, and then click Delete.

Advanced optional syntax with the SP1 or later versions of Ntdsutil.exe

Windows Server 2003 SP1 introduced a new syntax that can be used. By using the new syntax, it is no longer required to bind to the DS and select your operation target. To use the new syntax, you must know or obtain the DN of the NTDS settings object of the server that is being demoted. To use the new syntax for metadata cleanup, follow these steps:
  1. Run ntdsutil.
  2. Switch to the metadata cleanup prompt.
  3. Run the following command
    remove selected server
    An example of this command is as follows.


    Note The following is one line but has been wrapped.

    Remove selected server cn=servername,cn=servers,cn=sitename,cn=sites,cn=configuration,dc=
  4. Remove the cname record in the _msdcs.root domain of forest zone in DNS. Assuming that DC will be reinstalled and re-promoted, a new NTDS Settings object is created by using a new GUID and a matching cname record in DNS. You do not want the DCs that exist to use the old cname record.


    As best practice, you should delete the host name and other DNS records. If the lease time that remains on Dynamic Host Configuration Protocol (DHCP) address assigned to offline server is exceeded, another client can obtain the IP address of the problem DC.
  5. If the deleted computer was the last domain controller in a child domain, and the child domain was also deleted, use ADSIEdit to delete the trustDomain object for the child. To do this, follow these steps:
    1. Click Start, click Run, type adsiedit.msc, and then click OK.
    2. Expand the Domain NC container.
    3. Expand DC=Your Domain Name, DC=COM, PRI, LOCAL, NET.
    4. Expand CN=System.
    5. Right-click the Trust Domain object,, and then click Delete.
  6. Use Active Directory Sites and Services to remove the domain controller. To do this, follow these steps:
    1. Start Active Directory Sites and Services.
    2. Expand Sites.
    3. Expand the server's site. The default site is Default-First-Site-Name.
    4. Expand Server.
    5. Right-click the domain controller, and then click Delete.
For more information about how to forcefully demote a Windows Server 2003 or Windows 2000 domain controller, click the following article number to view the article in the Microsoft Knowledge Base:
332199 Domain controllers do not demote gracefully when you use the Active Directory Installation Wizard to force demotion in Windows Server 2003 and in Windows 2000 Server

Determine the DN of the server

There are several ways to obtain the DN of the server object that is to be removed. The following example uses Ldp.exe. To obtain the DN by using Ldp.exe, follow these steps:
  1. Run LDP.
  2. Bind to rootDSE.
  3. Select View\tree. Base DN should be cn=configuration,dc=rootdomain,dc=.
  4. Expand Sites.
  5. Expand the site where the server object resides.
  6. Expand Servers.
  7. Expand the server that you are removing.
  8. Look for a line on the right hand side that starts with DN.
  9. Copy whole line excluding the DN.


    Example snip of the first part of the LDP spew:


    Expanding base 'CN=DC1,CN=Servers,CN=Default-First-Site-Name,CN=Sites,CN=Configuration,DC=corp,DC=com'... Result <0>: (null) Matched DNs:  Getting 1 entries: >> Dn: CN=DC1,CN=Servers,CN=Default-First-Site-Name,CN=Sites,CN=Configuration,DC=corp,DC=com”  What you would copy would be   "CN=DC1,CN=Servers,CN=Default-First-Site-Name,CN=Sites,CN=Configuration,DC=corp,DC=com"
For more information, click the following article number to view the article in the Microsoft Knowledge Base:
887424 "DsRemoveDsDomainW error 0x2015" error message when you use Ntdsutil to try to remove metadata for a domain controller that was removed from your network in Windows Server 2003


Working Domain controller which must be replaced for some reason

  1. Demote the domain controller using the dcpromo tool. See the Microsoft Knowledge Base Article Q238369 at http://support.microsoft.com/default.aspx?scid=kb;en-us;238369 about how to Promote and Demote Domain Controllers in Windows 2000.
  2. Install the new domain controller.
  3. Promote the domain controller using the dcpromo tool. See the Microsoft Knowledge Base Article Q238369 at http://support.microsoft.com/default.aspx?scid=kb;en-us;238369