A few months ago I wrote a tutorial showing you how to backup your files in Windows Vista. In this article I will show you how to restore those backups using the Backup and Restore Center.
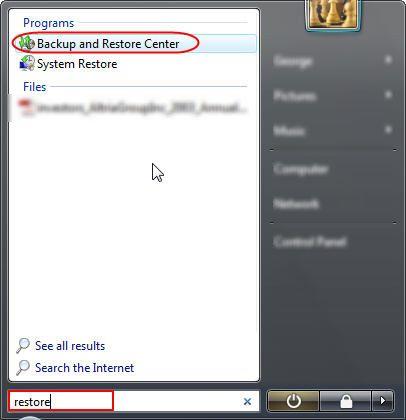
In the search field of the Start Menu type the word 'restore' and then click on the Backup and Restore Center shortcut. Alternatively, you can go to Control Panel -> System and Maintenance -> Backup and Restore Center.
Backup and Restore

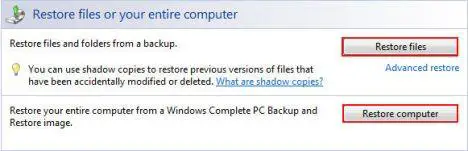
In the Restore files section, you have two options: Restore files and Restore computer. In this tutorial, I will cover the Restore files procedure.
Backup and Restore

How to restore files
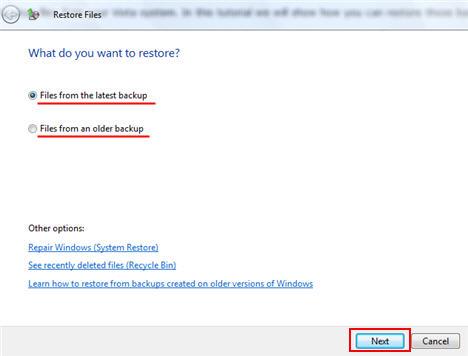
After clicking on the Restore files button, the wizard will ask if you want to restore files from the latest backup or from an older one.
Backup and Restore

Choose the option you prefer and then click Next.

Backup and Restore

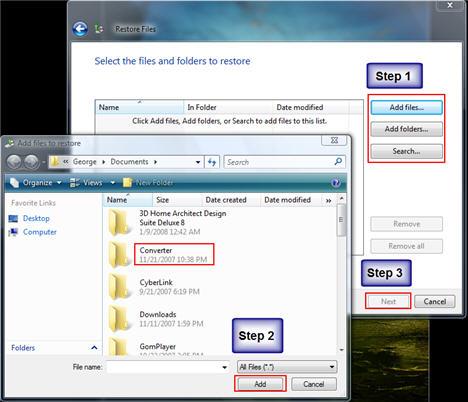
Now you have to browse and add the files and folders that you want to restore.
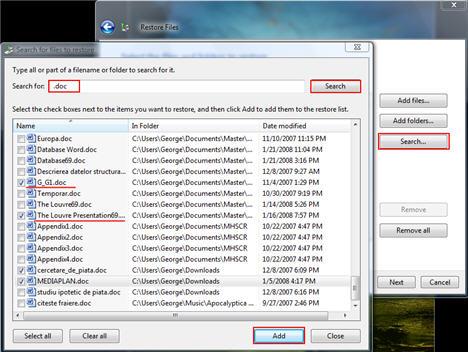
First, click on the Add files or Add folders button. Then, find the files or folders that you want to restore, select them and click on the Add button. Repeat this procedure until all the files or folders that you want to restore are present in the Restore Files window.
Notice: You are allowed to browse only through files and folders that were previously backed-up.
Backup and Restore

If you can't find a specific file or folder click on the Search button. Then, type the name of the folder/file in the search field and click on the Search button. If the folder/file has been found, select it and click on the Add button.

Tip: If you don't know the name of the file you are looking for, but you do know what the file type, you can search for all the files that have the same extension (.doc, .mp3, .xls, etc.) as the file you are looking for. For example, type '.doc' in the search box and click on the Search button.

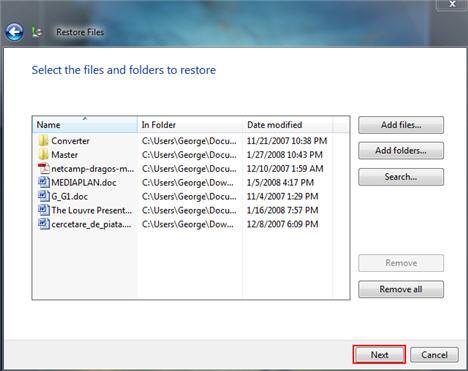
After you have finished adding the files or folders that you want to restore, click on the Next button.
Backup and Restore

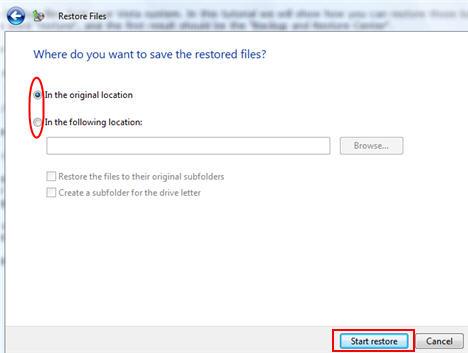
Now, you will be asked if you want to restore the files in their original location or in a different one. Choose the option you prefer and then click on the Start restore button.
Backup and Restore

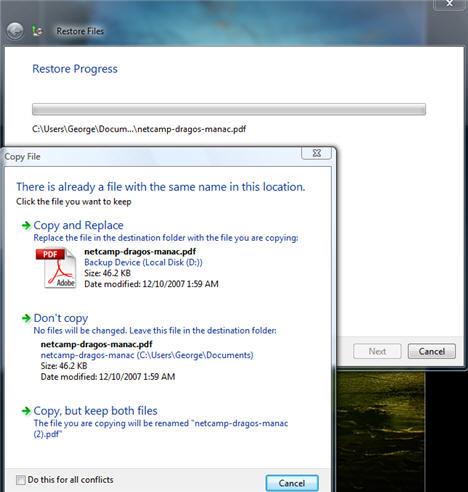
Notice: If the same file that you want to restore is found in the same location, you will be notified and you will have to choose one of the following options: 'Copy and Replace', 'Don't copy', 'Copy, but keep both files'.
Backup and Restore

After a while, the restore process will be completed. Once you are notified that the files were restored, click on Finish.
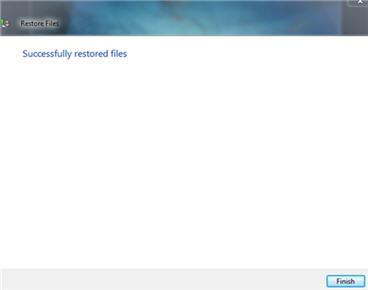
Backup and Restore

NOTE: Windows Complete PC Backup and Restore is not included in Windows Vista Home Basic or Windows Vista Home Premium.


System Restore is a feature that allows users to restore their system to a previous state. It offers a way to undo all the changes in the system files,registry keys, installed programs, etc, to a previous state, without affecting personal files such as documents, photos or e-mails. It was first implemented in Windows Me and since then it was included in both Windows XP and Windows Vista.
By default, Windows Vista creates the so called "restore points" every day. The restore points are created automatically, before any significant system event such as the installation of a program, device or system update. Also, restore points can be created manually by the user.
When something goes terribly wrong with your system you can restore it to a previous state and you will be able to use it again. In this tutorial we will show you how to do that usingSystem Restore.
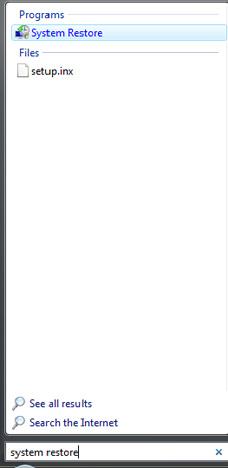
There are several ways to find System Restore. The easiest is to type "system restore" in theStart Menu search field and press Enter or click on the search result.

Start Menu

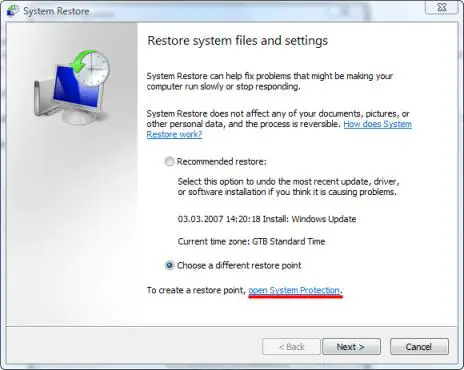
The main System Restore window will open. You have two options: to restore your system to a previous restore point or to create a new restore point.
First, we will show you how to create a restore point.

System Restore

In the lower part of the System Restore window you should see a link saying open System Protection. Click on in.

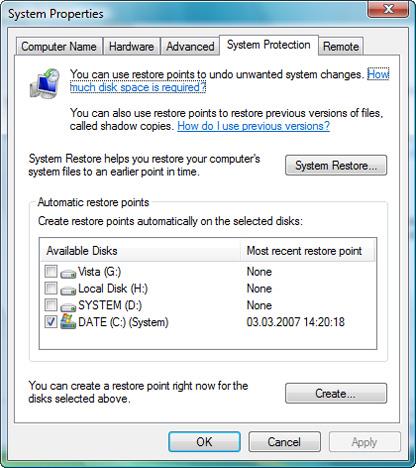
System Properties

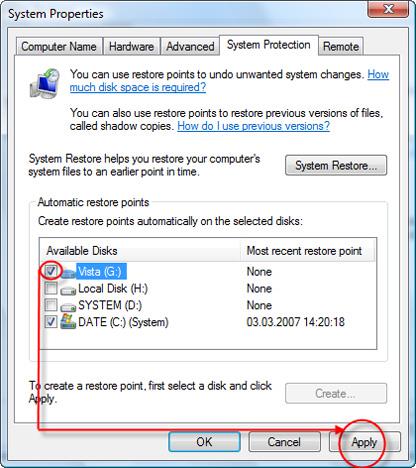
A new window called System Properties will pop-up. Here you can select the drives which will be included in the restore point. To select them, simply click in the appropriate check-boxes and then click the Apply button.

System Properties

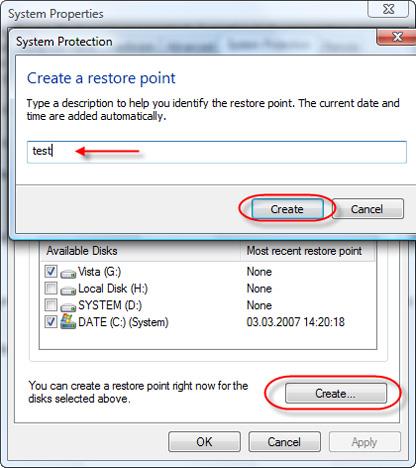
Now you can create a custom restore point for the selected drives. To do that, click the Createbutton, type the name for the restore point, and click the Create button once again.

System Properties

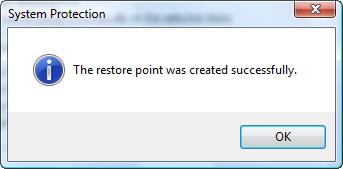
Windows Vista will create the restore point for the drives you selected. After a while you will receive the confirmation that the restore point was created.

System Protection

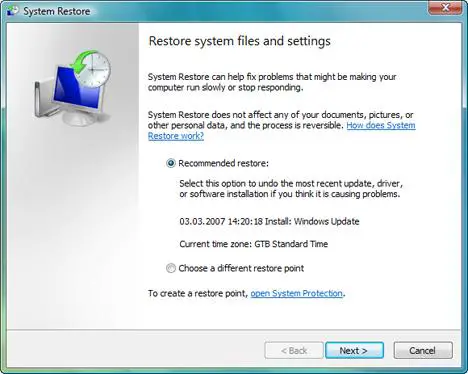
To restore your system to a previous state you can use the recommended restore point or you can choose a different one. The Recommended restore option will restore your system to the most recent restore point.

System Restore

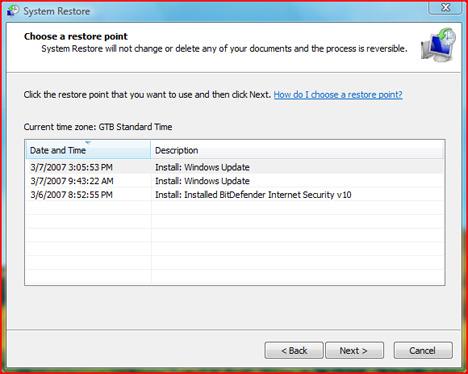
If you select the second option, after you press the Next button, you will see a list of available restore points. Select the one you prefer and press the Next button once again.

System Restore

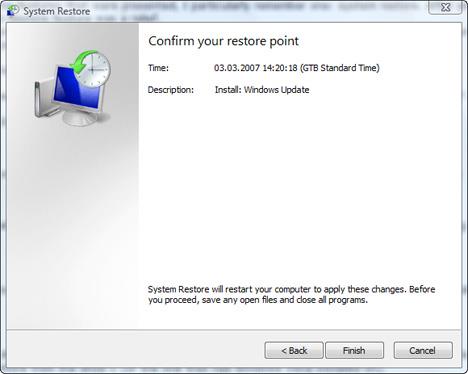
Now you are asked to confirm your restore point. Click the Finish button and System Restore will restart your computer to apply the necessary changes.

System Restore

When the process is finished your system will be back to the state you selected.